
In the previous posts, we learned about the ADX2 plug-in for Unity and its components, and how to generate game audio data that can be used in our Unity project. This time, we will indeed copy the files generated into our project and check them in the Unity editor using the Atom window.
Importing CRIWARE into our project
First, we need to add ADX2 to our project. Please note that since ADX2 is part of CRIWARE, the plug-in itself is named CRIWARE.
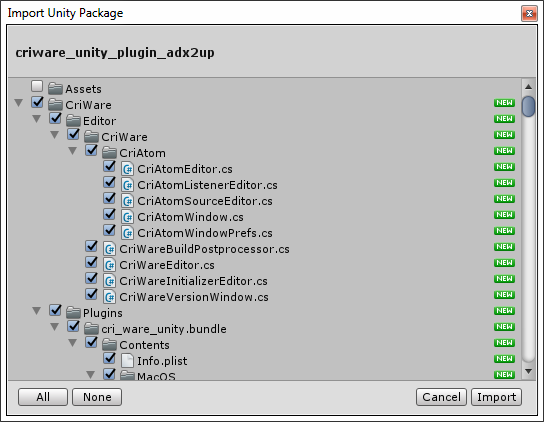
Once you have installed it on your computer, it can be found in the following folder: CRIWARE\SDK\Unity\plugin. The package is named criware_unity_plugin.unitypackage.
In Unity, from the “Assets-> Import Package” menu, click on the “Custom Package” command. Then select the file mentioned above. Leave all the files selected and click “Import”.
 Note: if later you need to update the plug-in in your project, do the same operation before loading a scene (only updated files will be overwritten).
Disabling Unity’s Audio
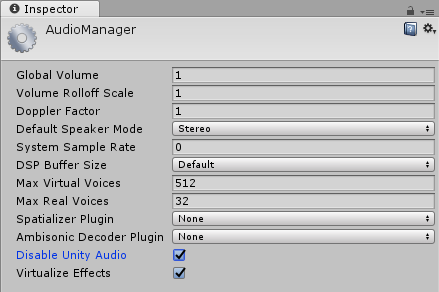
Since you have ADX2, if you are not planning to use any of Unity’s standard audio features, you can disable its audio system. It may reduce the CPU load and the memory usage of the application a bit.
To do this, select the “Edit->Project Settings->Audio” menu command. In the AudioManager settings that are displayed in the Inspector, check the “Disable Unity Audio” box.
Copying the ADX2 data into the project
In the previous post, we generated the binary data corresponding to our ADX2 project: the ACB files (*.acb) that contain the information about the Cues, playback parameters and wave data for in-memory playback, the AWB files (*.awb) that contain wave data for streaming playback (if any) and the ACF file (*.acf) for all the global settings.
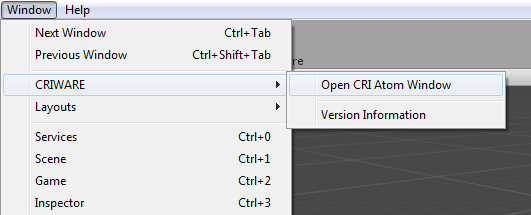
Now we need to copy these files into our Unity project. Although this could be done manually, it can become cumbersome on larger projects. Luckily, it can also be done within Unity. First, select the “Window->CRIWARE->Open CRI Atom Window” menu command.
In the CRI Atom window, click on the “Use Copy Assets Folder” check box.
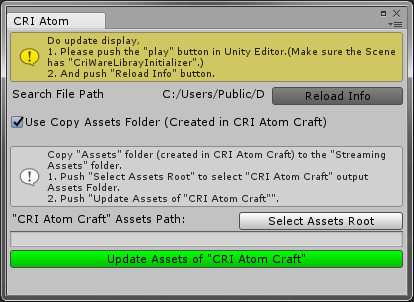
Click on “Select Assets Root” to specify the path of the binary files that were generated when building the audio project in AtomCraft. It is usually the “public/Assets” subfolder under your AtomCraft project folder. However, for in-game preview data, this will be “public/inGamePreview/Assets” subfolder.
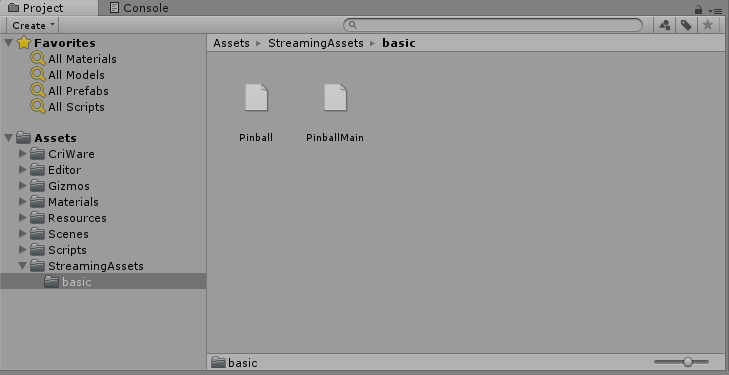
Once the assets path selected, click on the green “Update Assets” button. If the copy is successful, the StreamingAssets folder will now appear in the Unity project.
Examining the data in the Atom window
Now that the data has been correctly imported into the project, let’s examine it. We must first initialize the CRIWARE library in order to be able to read the content of the data. To do this, go into the “GameObject->CRIWARE” menu and select the “Create CRIWARE Library Initializer” and “Create CRIWARE Error Handler” commands. Both objects should appear in the Hierarchy. No need to change their options at this point.
To visualize the data, run the scene which includes the CriWareLibraryInitializer object and in the Atom window, click on the “Reload Info” button.
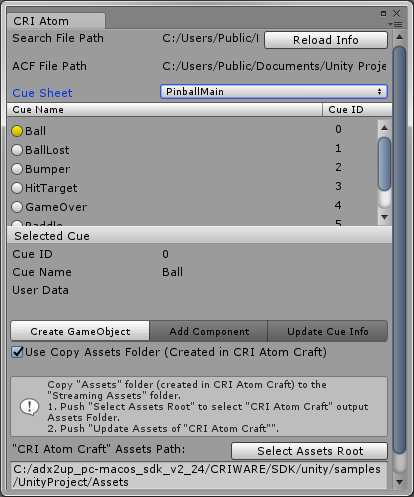
A lot more information is now displayed. The Atom window is actually a control panel that enables the creation of ADX2 components in Unity. From this window, you can select a CueSheet, list its Cues, and create CRI Atom Sources, which is exactly what we will do in the next post!